Showing posts with label salami. Show all posts

Thursday, August 16, 2012

Salumi

My pre-order of Salumi came in the mail today. Busy weekend ahead, I probably won't get to flip through it until next week. I hope it's good.

Saturday, November 26, 2011

Charcutepalooza

Projects 11 & 12 and Thanksgiving Wrap-up

Project 11 was a dry cure and I went with a Tuscan Salami recipe. After the salami had lost just over 30% of its starting weight, I put them into vacuum bag, sealed them and put them in the fridge. Then I traveled for work. About a week before Thanksgiving, I opened some of the vacuum bags and tasted. It was good, but a little more drying would help. So I wrapped the salami in parchment paper and put them back in the fridge. A week in the fridge improved them significantly. I sliced a few of them up for a Thanksgiving appetizer. I plan to bring a bunch to the curling club on Monday night.

The final Charcutpalooza project was to celebrate the skills learned at a meal. I thought Thanksgiving would be the perfect opportunity to share some of the Charcutepalooza experience. The goal was to have at least 3 Charcutepalooza inspired items at a meal. The first at Thanksgiving was the salami. The second was the grilled vegetable and goat cheese terrine. I did my best to slice it so it looked pretty. It tasted better than it looked. I will chalk this up to being one of those "now that you have done it once, the next time will be better" experiences. Now I know what to expect.


Next up was the turkey. After the dry rub and rinsing, I smoked the turkey. This is that offset smoker that recently made the trip from my sister-in-laws house to mine. Behind it are the trusty Webers. That 18" one on the left has been with me since 1997. The 22" on the right was a father's day gift 6 years ago.


If I had to guess, the turkey wasn't fully thawed. I thought it was but I don't think so. The bird went into the smoker before 11 AM. By 3:30 (the time I was hoping to take it off to rest), the temperature of the thigh was 120 degrees. I took it from the smoker and went to the oven and named the process smo-roasting. While it came out late, the turkey looked pretty and tasted pretty good too. And through the power of beer, wine and some North Carolina moonshine my brother brought, I was the only one that cared about the delay with dinner.


The fourth and final Charcutepalooza inspired dish was the string beans. I cooked up some homemade pancetta. I added some garlic and a dash of vinegar to the pan and the reheated the blanched beans. It came out pretty good. Not too many beans were left and that pancetta is delicious.


All in all, it was a good Thanksgiving.


And last night there were leftovers. This is one of my favorite sandwiches. You've got good bread, turkey, stuffing and gravy in there. Something about bread in bread is delicious. While I was taking this picture I was asked, "Daddy, why are you taking pictures of your dinner?" Probably because I'm a little crazy.

Wednesday, November 16, 2011

And so it begins

If I am counting correctly, this is the 10th year we are hosting some Thanksgiving festivities. Last year, I fell behind in the prep work and never really caught up. This year is going to be different. I've already looked and updated the all powerful Thanksgiving spreadsheet. Still have a few tweaks, but the preparations have already begun. First thing on the prep list was making more stock. I hit the Asian Market on Central up for two packages of chicken feet. Let them simmer in some water for 3 hours or so then I added onion and a lot of carrots.


I skipped the celery this time around. I was recently flipping through the French Laundry cookbook (which by the way is full of things I would love to eat but will never cook for myself), and Thomas Keller thinks the celery adds bitterness to the stock. It could be the lack of celery or it could be the overload of carrots and I suppose it could be both, but this stock was very sweet. Although it is probably closer to an aspic than a stock. Once it chilled it was chicken flavored jello.


I could have held this bowl upside down and nothing would have happened. The chicken jello was scooped into 2 bags and frozen. The larger bag is for gravy and the smaller bag will get a little water added to it before going in the dressing. Tomorrow, I have to try the Tuscan Salami and Saturday I'll hit the Troy Farmer's Market. I think I might want to try and smoke a chicken in the smoker before I do the turkey. Or at least fire it up and try to manage the heat. This year's cooker is different than in years past. I bought this one with the winning from a good day at the track.The last time I used this smoker...it was before I hosted a Thanksgiving. It has been resting in a garage in Rotterdam for over a decade. Through the magic of my brother-in-laws pickup truck, it made the trip to our house.

I also have to come up with one more dish featuring Chacutepalooza techniques. The final challenge is to host a meal featuring at least 3 of the techniques practiced during Charcutepalooza. I've got the smoked turkey and Tuscan Salami lined up. I've got to come up with one more. Right now, I'm leaning towards a grilled kielbasa appetizer. I'm going to think that one over. A week is still plenty of time. Plenty.

For now, I am enjoying the euphoric, totally ready for preparing Thanksgiving buzz. I am seriously so far ahead of last year it is sick. I'll let you know how I feel Wednesday night. But for right now, piece of cake.

Wednesday, November 2, 2011

Charcutepalooza Project #11

Curing

Well, the Charcutepalooza Challenge is winding down. And this isn't a project you can finish at the last minute so when I had a little time, I got started. Normally, I grind and stuff sausage on the same night. Unfortunately, I usually start these projects at 9 after everyone has gone to bed. The grinding and stuffing don't take that long. It's the cleaning up that is really the pain in the ass. And with this project you have to add making all kinds of bastardized knots. Sure the knots probably aren't supposed to be bastardized versions of real knots, but I was never in the scouts. I excel at shoe laces and if the situation called for it, I think I could remember how to tie off a line to a cleat on a sailboat. That's about it. Instead of grinding, stuffing and than playing with twine on the same evening (which in the past has ended close to 2 am), I split the work up.  On Saturday, I cut up the pork butt I purchased from Sweet Tree Farm and mixed it with all the Tuscan Salami ingredients. On Sunday, I ground the meat and mixed everything together. On Monday, after my trick or treaters were passed out in their sugar induced comas, I stuff the salami, tied it all up and hung it in the basement. Here's the play by play.

I brought out the pork butt and cut up the meat. The ratio of pork to fat looked good to me so I didn't supplement the mix with any back fat.


Once the meat/fat was cut up, it was weighed (1711 grams for those of you keeping score at home).


This particular formulation was created by Chef Bob del Gross over at the Hunger Artist. For the record, I am not sucking up to a judge. Instead of trying something new, I wanted to try and repeat a previous success. As far as curing salami goes, I have always tried something new and had success as well as a few failures. Therefore, in a roundabout faulty logic kind of way, I am trying something new by attempting to repeat previous results. That's my rationalization and I'm sticking to it.

Armed with this weight, I was able to calculate how much of the rest of the ingredients I needed. Starting from the top left corner and working clockwise you have: a glass with a little over 3 grams of Bactoferm F-RM-52 dispersed 28 grams of distilled water, a bowl with 37 grams of Kosher salt and 5 grams of Instacure #2, a bowl with 23 grams of dextrose, a bow with 9 grams of toasted fennel (left half of bowl) and 9 grams of coarsely cracked black pepper (right half of bowl), a small glass bowl with 6 grams of minced garlic, and finally 137 grams of red wine.


Every thing got mixed together and went back into the fridge for a good soak. Then I drank the remaining 600 or so grams of wine. Pretty tasty. See, the metric system can be fun. That was all on Saturday.


On Sunday, I ran everything through the grinder.


Once the meat was ground, I mixed in any remaining liquid (kind of in the left of the photo) and stirred to combine. Here's what went into the fridge on Sunday.


After Halloween came to an end on Monday, I put the meat into hog casings. This isn't the easiest thing to photograph when working by yourself. As a general rule, my wife prefers our digital camera to remain sausage free. Here's the set up. I put the canister of the vertical stuffer in the freezer for a while to get cold. That's why it is frosty.


Got the casings ready to go and the meat in the stuffer.


A few minutes later, all of the salami are stuffed and ready to be tied.


With a new episode of Beavis and Butthead on in the background, I sat down at the table and began to tie up the salami. The show had a few smiles but it was funnier in 1995 when drinking a beer 1:30 in the morning with your roommates while winding down from finishing an engineering assignment in college. When Beavis and Butthead was over I turned on an episode of Community and kept making knots. The lesson I took away from this 45 minutes or so of playing with twine: next time, turn on the radio. Here are the salami in bondage.


Each string of salami was weighed so I can keep track of moisture loss. The weight was written on a piece of masking tape and stuck to the bottom. The ambient humidity in the basement is pretty much right in the salami's wheelhouse. The humidity, measure by the little white box at the top/center of the picture  moves between 60 and 65%. The air temperature is also in the low 60s. I took down the plastic drop cloth I have used in the past and I'm just going to let the salami hang out down there. They will probably come down in another week or so. I hope they taste as good as they currently smell.

Sunday, November 28, 2010

Thanksgiving Weekend Wrap Up

On the plus side, I was able to bounce back from falling behind in my Wednesday prep and put out a pretty good meal. I ended up skipping the Tuscan salami. I think it came out just so-so. And certainly not being above average is disappointing. Perhaps the larger ones requiring a longer hang-time will fair better. I'll try them this week. But here are my two favorite things from the weekend.

The first was a story told to me by by sister-in-law Lisa. My 7-year old niece Abby was riding in the backseat next to her 3-year old brother Ryan. Abby says, "Ryan, next week is Thanksgiving! And we get to go Allison and Casey's house. Do you know what my favorite part of Thanksgiving is?" At this point Lisa said she really started listening because she wanted to hear this..."Allison and Casey's other grandma is there. And do you know what she brings? She makes cookies in the shape of everyone's name. So I'm going to get an A and you're going to get an R!" As fate would have it, an A (there are a total of 4 A cookies made) and the R were on top of the separate container holding the letter cookies.


That is the expanding tradition of Grandma Cookies. One cookie is baked in the first letter of everyone in attendance. It originally started out as just the kids years ago when I was a kid, but now the kids from back then have kids of their own. And it just kept growing...Besides the letters, the traditional cookie shapes are moons, stars, circles and the shapes from a deck of cards. I could eat them all.

My second favorite thing about this years Thanksgiving was a new guest. This was the 10th Thanksgiving we have thrown here. There are some that have made a few, some that have moved onto other venues and a handful that have been to them all. My brother-in-law's brother Tony came  this year. Their parents recently moved to Florida and he was left without his annual place to go. I'm glad he came, but I am happier that he felt comfortable enough to stay after his brother and family left to get kids to bed. That's nice. Unfortunately, Tony cleaned up at the post-dinner poker game that has kind of become a new tradition. Next year is my year, I feel it.

Thursday, November 11, 2010

Casing the Tuscan Salami

This all happened Monday night. It was time to grind, stuff and hang this batch of Tuscan Salami. The grinding and stuffing is pretty easy. The hardest part of that is cleaning up. The difference between a pretty easy fresh sausage and the more difficult salami for me is the butcher's twine. I still can't tie a salami nicely. That being said, I am pleased with how this batch of slami went into the chamber. I hope it ends up tasting as good as it smell now. Here's how I spent my Monday evening....

First up, I got some casings soaking. The casings are salt packed so they need at least half an hour to soak. I also flush them out a few times. The beef middles were very different than the hog casing. Probably to be expected since the two animals are also very different. I had expected a difference in size, but not a difference in texture. Here are the two types of casing soaking. Hog casing on left, beef middle on right.


Next up, toasting some fennel to get added to the meat before the grind. This also smells good.


I tossed in the toasted fennel and started grinding. For the benefit of the camera, I only took a picture when I was done grinding.


I split this up and gave the meat a quick mix with the paddle attachment on the Kitchen Aid. No pictures of that. Then it was time to flush the casings and get stuffing. Well, after cleaning up all the grinding stuff and taking a quick break. I did the the beef middles first.


After stuffing two larger salami, I stopped using the beef middles and went onto the hog casings.


After stuffing six of the smaller diameter salami, I put the leftover beef middle back on and mad one more larger salami with the rest of the meat. Here's what I ended up with:


Now it was time to tie them up and weigh them. It took a little while. The first delay was finding the butcher's twine. I keep it on my spice shelf. It wasn't there. I looked all over the kitchen. It wasn't there. I asked my wife if she had seen it. "The girls have it, I thought you gave it to them." Not sure how or when they took it, but it was over by a craft table and I think they had been making necklaces with it. Once I had the string, the pace picked up a little bit. Not much though. About an hour later every thing was weighed, labeled and tied up. Once again, I give you salami in bondage:


These went into the chamber which got sent up slightly different than last time. Still the same piece of plastic hanging from the floor joists, but this time the humidifier isn't on the floor. Instead, it is on top of the winner cooler I bought off of Craigslist to cure salami in (it didn't work - wine fridges don't work like regular fridges and if you close the door you will have 100% humidity, no air circulation and you will be growing fuzzy, nasty looking mold).


I hung the salami fairly low. The idea was to have the humidity fall to the level of the salami and not be in the line of the humidifier fan.

The last thing I did was about 12 hours after the salami had been hanging. I bough another culture. This one is supposed to bloom a beneficial mold on the outside on the salami and prevent the case from drying out before the middle of the salami. I bloomed three grams of the culture in a little over a cup of water. Then I pour the cultured water into a lasagna pan and rolled the larger salami and 3 of the smaller salami in the water. Then I hung it up again. No signs of this culture bath doing anything yet.

The humidistat on the humidifier consistently reads 70%. The humidity readings I get on the indoor/outdoor gizmo (the little white box next to the salami in the picture above) are consistently 60%. My guess is that the truth is somewhere in between. The temperature in there seems to fluctuate between the high 50s and low 60s (Fahrenheit). The salami will hang until they have lost about 30-40 percent of their original weight. Hopefully, some will be ready for Thanksgiving.

Sunday, November 7, 2010

Tuscan Salami

Those starter cultures I ordered came and and I had to get moving if the salami was going to be cured for Thanksgiving. I pretty much followed the same recipe as last time around with a few minor changes. I changed the starter culture, I am probably going to add a spray on culture and  I'm using a little less fat. I used a coarse grind on the fat last time. And these salami are too narrow (think a little thinner than commercial pepperoni sticks). So I will grind everything, eyeball the fat content and maybe mix in a little more. Here's where we are so far...

We start with a pork butt from Cardona's. This is weighing in at about 6.25 pounds. It has been frozen for awhile. This is to eliminate the trichinosis larvae that are 99.5% probably not there to begin with. But my kids really like this and I'm planning to serve it to guests. Not worth the risk.


The butt gets sliced into long strips. The strips are easy to feed into the grinder attachment on a Kitchen Aid mixer. I weighed out all the other ingredients and they are ready to go. There is salt, Cure#2, pepper, dextrose, garlic, Chianti, and culture dispersed in some distilled water.

The whole mess gets mixed together and put in the fridge. This is going to give the culture a little time to get going since I will not be incubating the salami (holding it at 80 degrees for 12-48 hours before going to regular curing temperature and humidity conditions).


On Monday night, I'll toast some fennel seeds, add it to the mix, grind it all, stuff casings and hang it. Might be a late night on Monday. I also got some beef middles with my culture order. They are a natural casing but with a bigger diameter than Italian sausage casings. I'll be making a least some of the batch a little bigger. It will take longer to cure, but I am curious to see how it comes out.

I set my curing chamber up tonight and started to raise the humidity inside it to get ready for the cure. And there is also 10 pounds of pork belly coming my way this week. Bacon and Pancetta are in my future.

Sunday, May 23, 2010

Week in review

Haven't had much to post lately. Went to a conference. Decent presentations and there was a fun hospitality room at night. Free Scotch. I'm surprised I left.

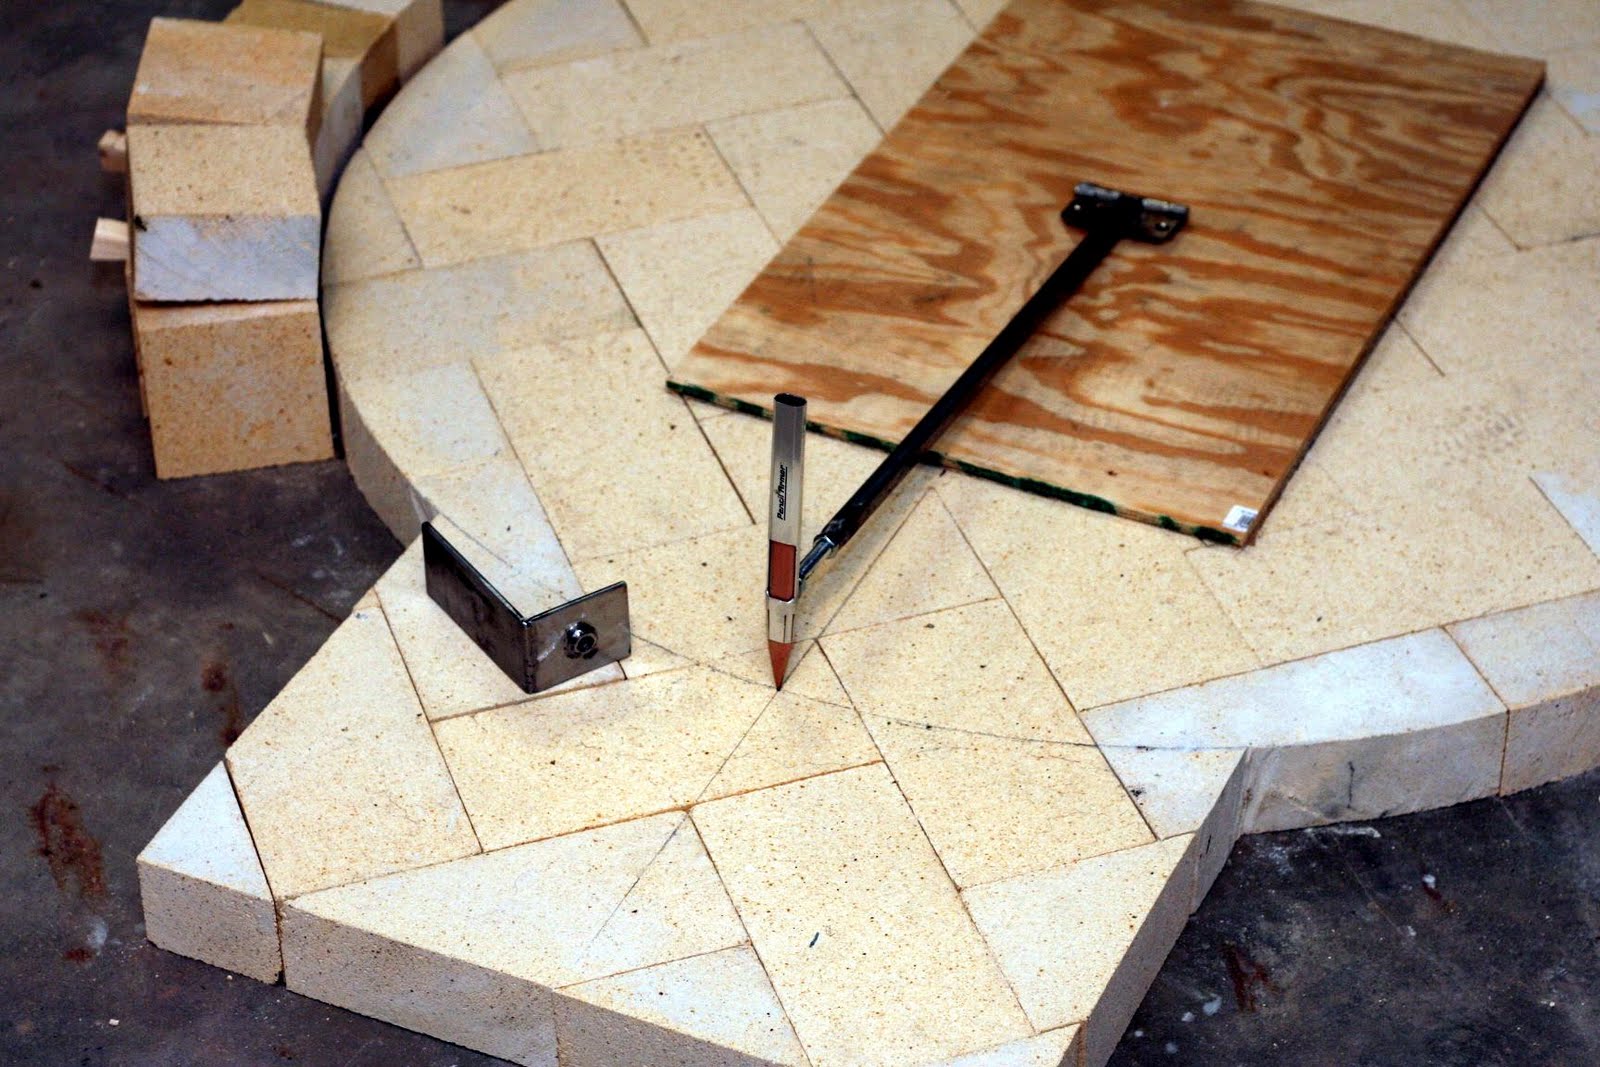
Still obsessing about the oven. Still leaning towards doing it, but the saner side of my brain is telling me to do more research. I think it has a point. There are a lot of decisions to make and things to learn before breaking ground. One perk of being at a conference and skipping the lunch was that I got to drive around a price things. In a comparison between Home Depot and Lowes, the Depot had better prices. Most of the cost differences were withing 30 cents. In defense of Lowes, they had a few things the Depot did not and their block was on sale this week. I also went to Harbor Freight to look at tile saws. Ouch. I'm also looking for a nicer used saw. But while I was at Harbor Freight, I picked up a cheap clamp that I might use in the Indispensable Tool. Here's a photo of one variation on the Indespensible Tool. There are many variations. It is basically a rod attached to a hing that is attached to something that can rotate. The clamp attachment can hold a brick in place. As the dome rises, the radius will stay the same. As you get really high, you can take the clamp off and attach a piece of wood for a form. You can also attach a Sharpie for scribing lines. I have no experience with one, but it apparently lives up to its name. I want one.


At the Forno Bravo site, I usually read a full thread on someone's oven construction every night. It is very educational. There is a guy named Dino in California that built a beautiful oven. Really impressive. But the oven's need a break. Clear the head. And what better way to do that than cure something. There is a new butcher shop in Waterford called Henry's Meats. I'm always looking for new places to try for a pork supplier. So far, I have found Cardona's to have the best pork butt to be turned into sausage and salami. Wasn't as impressed with their beef or chicken. Anyhow, something need to get made. Enough sitting at the computer and daydreaming about pizza. Gotta to cook something. And finish painting the deck too. What a pain in the ass that is.

Thursday, November 19, 2009

Finished Tuscan Salami


Took it down and weighed it last night. There was a 45% weight loss. I was nervous and thought it might be too much. Not a problem. I think it tastes pretty damn good. I would also say it is better than a lot of higher end salami that is available in this area. A while back, I used to be my own 'toughest critic.' That has changed and earlier tonight, I faced my current toughest critics.

My daughter Allison gave it the rating "I love it."

My daughter Casey gave it the rating "Yummy, Daddy."

The two of them ate the rest of the small salami I had been cutting for tastes. Needless to say, I was a wee bit proud of my efforts.

Wednesday, November 11, 2009

More Tuscan Salami

The next step was to set up a curing area. I had a 12 foot length of poly and decided to with something close to a 3 foot square shape. Instead of the original plan to use staples, i bought small hooks that I screwed into the floor joists. Using a punch I put holes in the poly and hung it like a curtain. This way, the chamber can come down a lot easier. I have a humidifier with a humidistat set at 70%. I also added a shark fin I had in the basement (it is a throwback to my younger parrothead tailgating days). The fin acts as a wall between the humidifier and the salami. I thought the humidifier fan moved to much air and the fin keeps the salami out of the breeze. Using the uotdoor part of an indoor/outdoor temperature/humidity weather gadget, I found that the relative humidity closer to the floor was pretty constant at about 70%. Here is a shot of the chamber, ironically located next to a home made dehumidifier (the duct work in the lower right of the picture).


Now it was time to grind the salami. I Use the Kitchen Aid attachment. Fat was ground through the larger plate, meat through the smaller plate. Someday, I think I will upgrade to a dedicated grinder, but this attachment has been working for the amount of sausage I make.


Toasted fennel seeds were added and every was mixed well. Then, it was into the sausage stuffer to get pushed into casings.


The hardest part of the prpject was tying the salami for hanging. I usually make a fresh sausage and twist it into links. Here, I had to tie them in a way where the know could support the weight of the salami. Then I used more string so the salami would hang low enough in the chamber. I ended up using what I would describe as a "bizarro" surgeon's knot. So far they have all held up. Here's a shot of the salami starting to age.

Sunday, November 1, 2009

Halloween Salami

I have been meaning to make a Tuscan salami for a few months now. I decided to try and have it ready to eat for Thanksgiving. Not sure if I'll make it, but it should be close.

Chef Bob Del Grosso made a similar salami over at A Hunger Artist. I'm not sure how many times I've read the post, but I promise the count is over 10. I compared his recipe to the Tuscan salami is the Charcuterie book and they were pretty similar. I followed the Del Grosso formula switching Instacure#1 for Instacure#2. I also like the way Bob sets up his percentages of ingredients. Being the nerd that I am, I set everything up in a Tuscan salami spreadsheet. Once you enter the weight of the meat in grams, the spreadsheet calculates how many grams of the rest of the ingredients you need including back fat. I kind of cheated with the bactoferm. I've seen people use a gram of it, and I've read that you can't use less than 5 grams. I split the difference and went with 3 grams.

The rest of the plan is to build my version of a mini curing chamber Bob put in his basement. I picked up some 3 mil thick poly drop cloth at a Lowes. I'm going to staple it to some floor beams and place a humidifier with a humidity sensor inside. I'm going to skip the fan for now and just open everything up to circulate the air once in awhile. The basement is typically in the low 60s. Hopefully the humidifier will keep the humidity up. Here is the recipe I used and some pictures of the meat. The meat is going to see a 3 or 4 day pre-grind age. I'll use the few days to get the chamber set up.


The recipe.


Ready for the rest of the ingredients.


To the fridge for a 3 to 4 day soak.